
Setting Up Caffe On AWS For Dummies
This is short tutorial on setting up Caffe to run on Amazon Web Services (AWS). If you’re hacker who lives on the command line, this is not for you. If instead, you are a recovering pure mathematician who is uncomfortable with the messy innards of your laptop, and even more uncomfortable with the cloud, this might be for you. You can find other tutorials with similar content, for example in Stanford’s CS231 course on Neural Networks. This might be more of a meta-tutorial, in that, for some cases, I plan to point you to resources and say “do this”.

If this tutorial proves to be useful, then I’ll add to it as needed. If you see a gap, or run into a thorny problem I haven’t documented, email me or comment and I’ll address it here.
Caffe is one of the top frameworks for Deep Learning. It abstracts away the details of implementing systems of neural network layers in a very nice way, and it’s well supported. The steps for installing and running Caffe are routine and well documented.
If you really want to train neural networks with any speed, you’ll want a GPU, and this is where it gets complicated. Many people, me included, are using a laptop without a GPU. My 2015 Macbook Pro has an Intel Iris Graphics card that can’t work with Caffe’s GPU mode. In the AWS instance we’re going to stand up, Caffe training runs about 30 times faster in GPU mode vs CPU mode. In other words, you want to run in GPU mode. Imagine running some back propagation on your laptop for 8 hours, seeing no results, and your laptop is on fire the whole time. Not great.
So you can go out and spend a week’s paycheck on a GPU, or you can try to setup something remotely. We’re just trying this out, so wouldn’t it be great if we could make small incremental investments. Since familiarity with AWS is increasingly a gateway to bigger and better things, it’s not a bad diversion to stand up a GPU instance on AWS. You earn passing familiarity with AWS, and access to a crazy amount of computing power on short notice. Fortunately AWS provides specific GPU instance types just for this situation, and for this tutorial we’ll be using one known as g2.2xlarge. It’ll cost you $0.65 per hour, no big deal if you can shut it on and off at will, which you can.
I’ll show you how to stand this up, how to setup Jupyter Notebook to run remotely, and then you’ll be all set to start a tutorial on Caffe such as Christopher Bourez’ tutorial.
Step 1: set up your AWS Account
We’ll create a free account. This is super straightforward:
- Head over the Amazon Web Services and choose the Create Free Account option.
- Choose personal account, and
- Go through the phone verification
- and provide billing details.
Step 2: set up billing alerts
The free tier gives you access to certain levels of compute without it costing you a dime. However, even with a free account you can deploy substantial computing power that costs a lot of money and you can be billed for it. Hence:
- you have to provide billing details,
- you should set up billing alerts to notify you when your bill exceeds a pain threshold and
- get in good habits of stopping your instance when you’re done with your work.
In our case, we’re going to deploy an instance that bills at $0.65 an hour. That’s not a lot, but if you leave it running all month, you’ll end up paying nearly $500. So getting in those good habits is really important.
I’ve been through one billing cycle now and it seemed as if my bill was automatically deducted from my debit card, which is convenient. I think my first bill was $3.25 ;)
- Enable Billing Alerts: go to the free tier alarms docs on AWS and follow directions to enable billing alerts, then
- Create a Billing Alarm: from the same page, follow the directions to create an alarm. I created just one, at $20, because I’m a frugal dude.
From CloudWatch you can also check in on billing in (near) real time, and a number of other things, so it can be a cool feature to explore.
Step 3: Spinning up an instance with Caffe pre-installed
There are tutorials out there on how to install Caffe from scratch on an AWS instance. However, one of the huge advantages of AWS is that you can spin up an instance from someone else’s image of their instance, and skip all the gnarly setup. The Berkeley Vision and Learning Center built an Amazon Machine Image (AMI) - ami-763a311e - that is specifically designed for using g2.2xlarge and g2.8xlarge (even greater GPU speed) with Caffe. They also provide instructions on how to build the image yourself, but it is easier to simply spin up an instance with this AMI. Here’s how:
- Because the image we want to use is in a specific region, we have to switch our location to that region. From the header controls on the right, switch your location to N. Virginia, aka
us-east-1d:
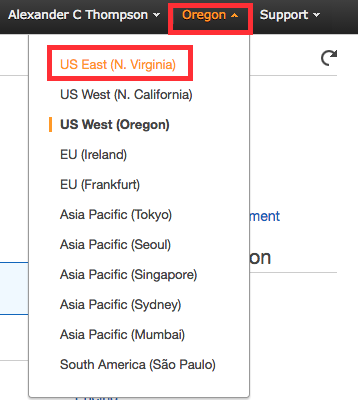
- From the AWS Console, hover your pointer over Services, and choose the EC2 (Elastic Compute 2) service:

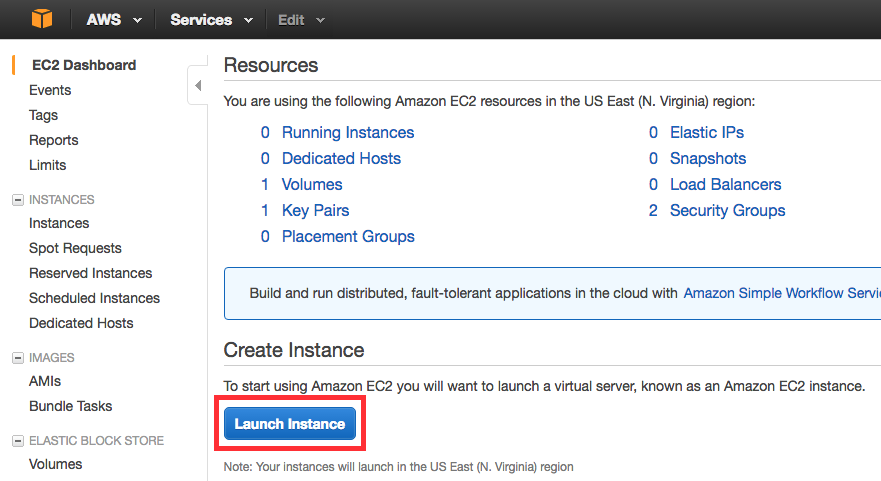
- Click on Launch Instance:
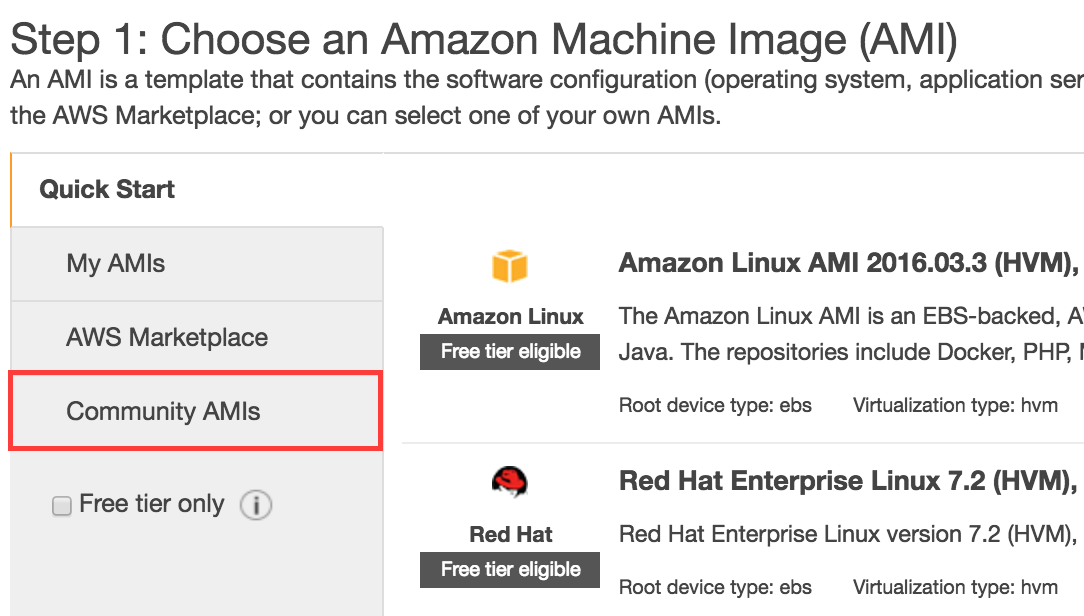
- Here you have the choice of what AMI to use. AMIs can come with all sorts of pre-configuration. In this case, we want to use an AMI that the Berkeley Vision and Learning Center set up with just about everything we need. So click Community AMIs on the left:
- Now search for AMI number
ami-763a311e, and select the result that comes up: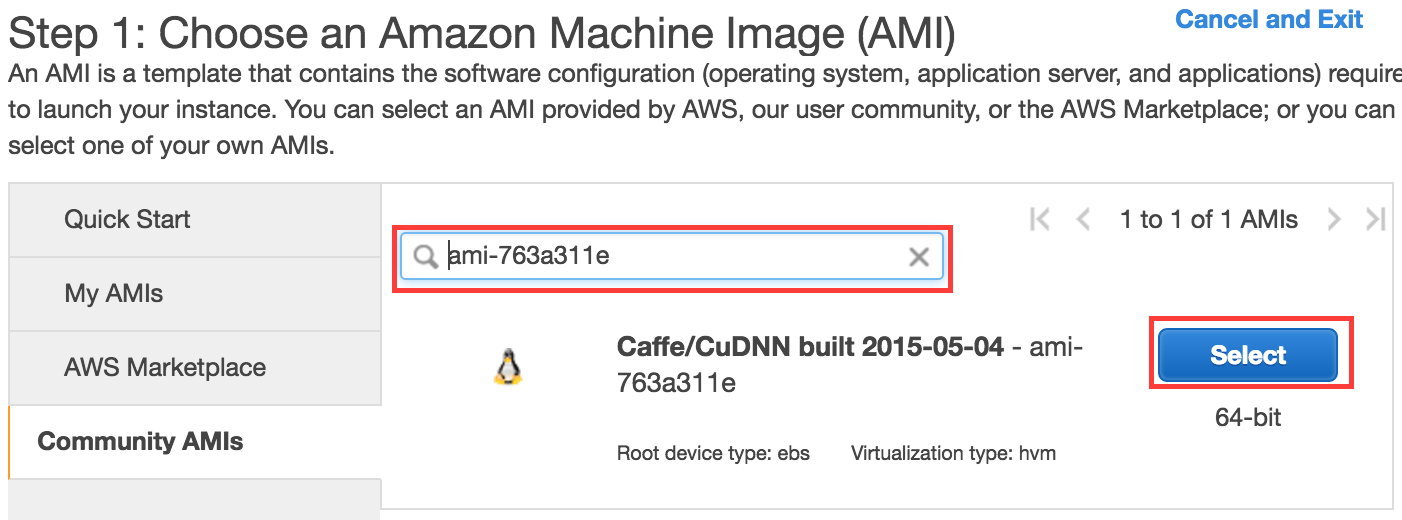
- Select the
g2.2xlargeoption from the list of instance types, and choose Review and Launch: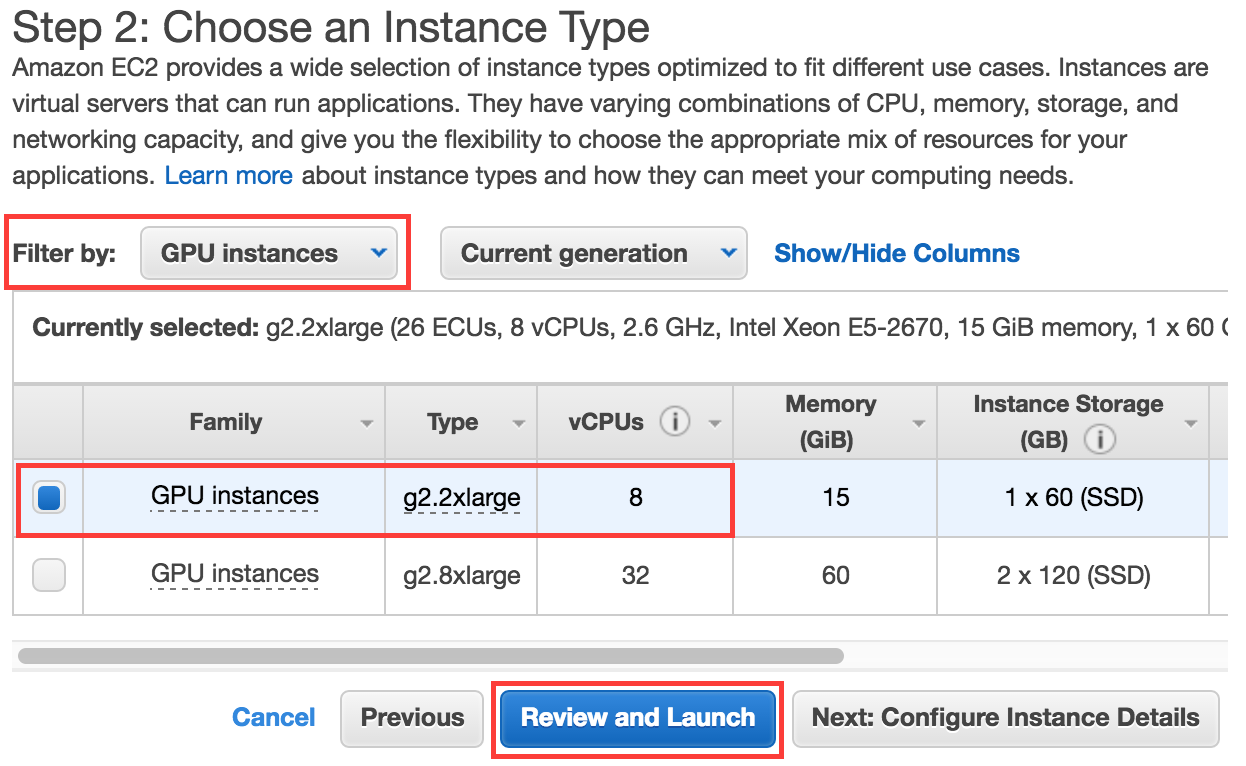
- AWS will now warn you that your security settings are insecure. This is not an area of expertise for me, and in my case, I adopted the attitude of ‘security by obscurity’ and continued. If you know better config settings, I’d love to hear from you.
- We will come back and add a new access rule for the security group, but for now continue.
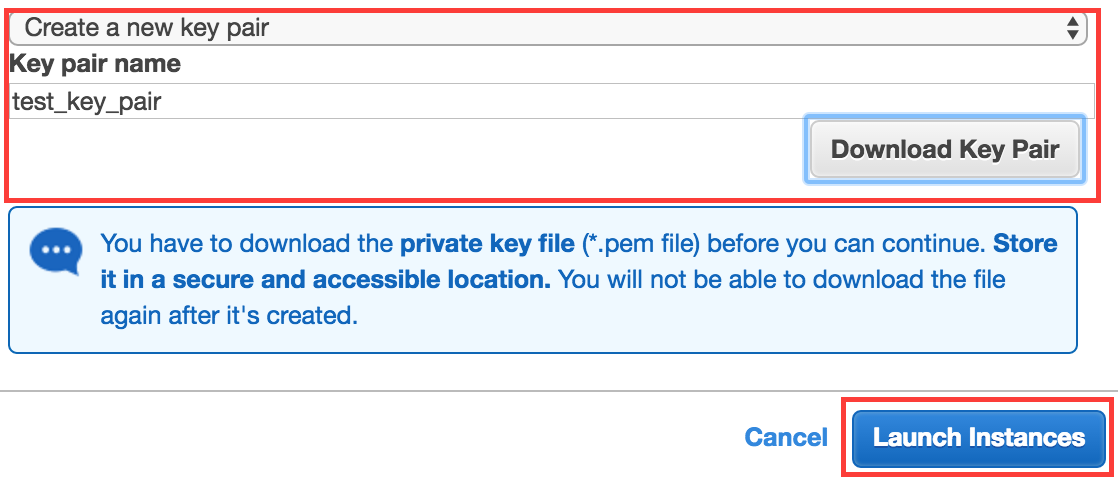
- You’ll be asked to create a key pair. Create a new key pair, download the key pair, and launch the instance.
- You should see a message that says your instance is now launching. At this point, you’re being billed for that instance, so be aware. To stop being billed, stop the instance.
How to stop your instance
The convenient thing about this instance is that you can stop and start the instance and, although processes will shut down, your stored files and settings will persist, with some exceptions. To stop the instance, and thus stop billing:
- Choose EC2 from the Services dropdown:
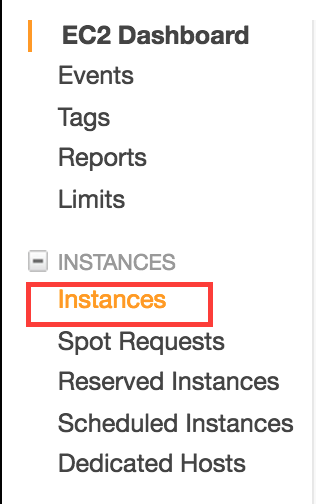
- Choose Instances from the sidebar:
- By clicking the box, select the instance in question from your list of instances (note that the status is Running):

- Then, using the Actions button, choose
Actions > Instance State > Stop: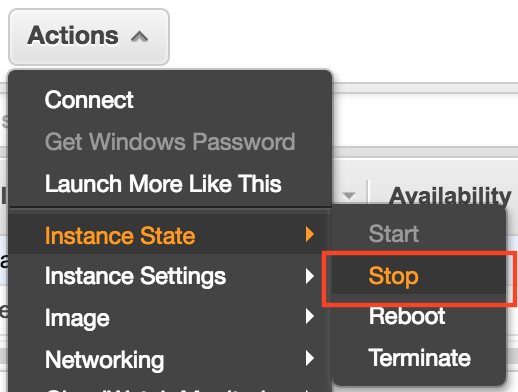
- Confirm that you want to stop the instance.
- The instance state will move to stopping and eventually to stopped.
What persists between stop and the next start
When you stopped your instance, you may have noticed a warning that indicates that data in your ephemeral storage will be lost. There’s essentially two types of storage here - ephemeral storage and storage that is backed by EBS.
- If you terminate your instance, you lose anything in ephemeral storage and EBS.
- But if you just stop your instance, EBS is preserved, while ephemeral is lost. So in general, we will make changes in EBS storage, so that our changes will persist between stop and restart.
- You can also leave the instance running all the time and both EBS and ephemeral storage will be preserved, but it costs $$.
The ephemeral storage is mounted in /mnt and, as I understand it, everything else is EBS backed.
This is not something I know that much about, but if you want to know more, there’s plenty about this, for example this Stack Overflow question.
Edit: this Stack Overflow answer notes that EBS instances do fail and that it is good to have an AMI with your basic setup requirements included. Figuring that out, and adding that to this tutorial is a potential future edit.
Step 4: SSH into your instance
SSH is easy for most of you but for me it is black magic, and I find that I engage in cargo cult programming anytime I work with it. To SSH into your new instance:
- (For OSX) take the key pair you downloaded when you set up your instance and stick it in
~/.ssh. - From
AWS > EC2 > Instancesselect the instance you spun up
and view the Description section. There you will find the instance’s Public DNS. Grab this. This changes whenever you stop and restart an instance, so you will to do this step each time you spin up an instance.

- SSH in via:
ssh -X -i [full path to key pair file] ubuntu@[Public DNS]
and you’re in. The -X is so that, when using Jupyter Notebook, you can open up XWindows in your local browser. You don’t need it otherwise.
Step 5: Setting up Jupyter Notebook to run remotely
Caffe comes with some nice introductory material in the form of Jupyter Notebooks, and generally I like to prototype in Jupyter anyway, so I’ll show you how to set that up. Essentially, we’ll follow the process from the Jupyter Notebook documentation.
Once SSHed into your instance:
- Run
sudo pip install jupyterto make sure that Jupyter is installed. - Run
jupyter notebook --generate-configto generate a configuration file for Jupyter. - If you like, run the steps from to prepare a hashed password.
-
Now, open
~/.jupyter/jupyter_notebook_config.pyin your favorite text editor, and add the following lines:c = get_config() c.NotebookApp.ip = '*' c.NotebookApp.password = u'[hashed password from step 3]' c.NotebookApp.open_browser = False c.NotebookApp.port = 8888 c.NotebookApp.certfile = u'/home/ubuntu/.ssh/mycert.pem' c.NotebookApp.keyfile = u'/home/ubuntu/.ssh/mykey.key'
Last, we need to modify your security settings so that your instance can accept HTTPS requests. You can run through AWS documentation on this (which is excellent), or do this:
- From
AWS > EC2 > Instancesview your instance and, in the description, note which security group it belongs to: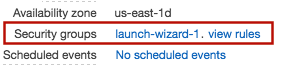
- From the EC2 dashboard where you go to find your instances, select Security Groups from the sidebar menu:
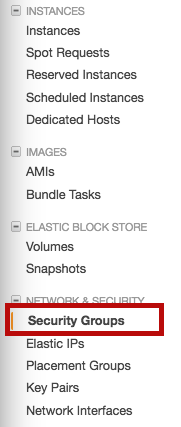
and select the security group you need to edit. - In the description box, choose the Inbound tab, then click Edit to edit the inbound options:
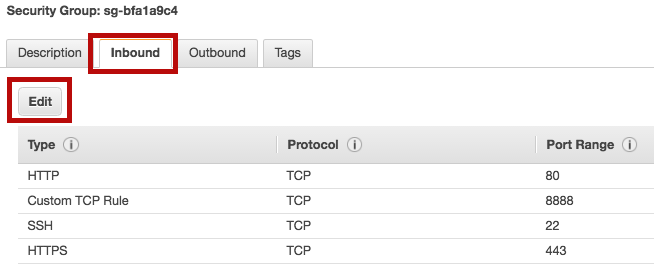
- Add a custom TCP rule on Port 8888 so you can hit that port for Jupyter Notebook:

Now, to run Jupyter Notebook, run jupyter notebook from your instance, and then point your browser to:
https://[Public DNS]:8888/
Step 6: Setting up PyCaffe
If you jump into Python and try import caffe, you’ll run into an error. You need to add your Caffe path to $PYTHONPATH, which you can do by adding:
export PYTHONPATH=/path/to/caffe/python:$PYTHONPATH
to your ~/.profile. Make sure to reload with source ~/.profile. Another option is to do the following whenever you import Caffe, but I see no reason why this is better:
caffe_root = '../'  # this file is expected to be in {caffe_root}/examples
import sys
sys.path.insert(0, caffe_root + 'python')

import caffe
Extra Credit
Some extra credit options that you may want to try:
- Learn and use the AWS command line tools. This is probably a fabulous way to start and stop instances, etc. Haven’t tried it yet.
- Set up remote access for your favorite local text editor. I like Sublime Text 3, and I usually set up remote access using Sublime SFTP when I start to get heavy into engineering. For now, since I’m putzing around with tutorials, I’m not there yet.
- One difficulty here is that each time you stop and restart the instance, you are changing the Public DNS and IP, so you will have to update any such values in your remote setup for your text editor.
- Boot up Git; it’s always good to version control running.
- Persist Jupyter Notebook even if your connection goes down by running Jupyter Notebook in a tmux session.